How to setup Ultra.cc VPN
All Ultra.cc plans have complimentary VPN service included, which allows you to surf the web securely and anonymously by tunneling your internet traffic through your slot. We're using OpenVPN, a mature and secure VPN protocol.
This guide shows you how to get OVPN config files to be used for your OpenVPN clients and setting up OpenVPN clients.
Currently, our OpenVPN service only works with IPV4 addresses. Please disable IPV6 if you intend to use it.
Setting Up Ultra.cc VPN
-
Login to your Control Panel and go to the
Connecttab of your service. -
Under OpenVPN access, you'll have 3 buttons that allow you to download 3 OVPN configs.
- This means you can connect up to 3 devices to your slot's VPN, with each device having a config.
-
Download a config by clicking one of the 3 buttons. It'll download a zip file as {username}-{config number}.zip.
-
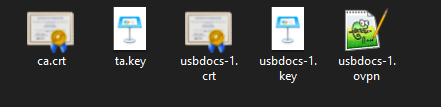
Opening the zip shows the following contents, as shown below. Extract them to a folder, to be used later.
OpenVPN Clients
Android
This short section will walk you through how to set up your OpenVPN Client in Android. For this guide, we'll be installing the ovpn profile in OpenVPN Connect, which is available on all Android devices.
Installing OpenVPN Connect
- Install the app from here: OpenVPN Connect
Syncing OVPN Files
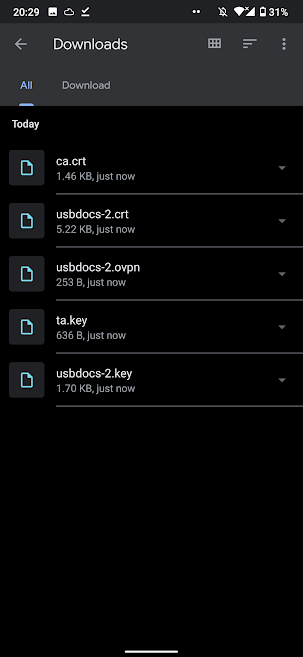
- Once installed, you can either sync your ovpn files to your Android or download it directly from your browser and extract it there. The files are downloaded and extracted directly to
Downloadsusing Google's Files App in the screenshots below.

Running OpenVPN Connect
-
Tap the OpenVPN Connect icon. The first time you launched it, allow it to send notifications and tap Agree to the Data Collection Policy.
-
Tap the File Tab and accept File Access permission on your app
-
Navigate to where you extracted your ovpn files. In this case, it'll be in
Downloads -
Select the ovpn file displayed and click Import. Once the profile is successfully added, tap Add
-
Once done, tap the switch beside the profile you just added to connect to the slot VPN. Then allow the app to make a VPN connection request to connect successfully.
-
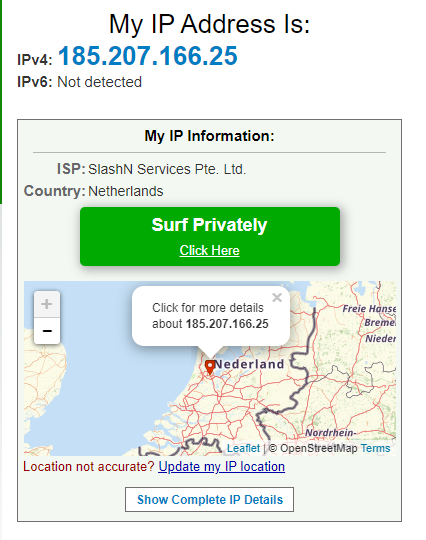
You can also confirm that you've successfully connected by visiting What Is My Ip Address. You'll see the server's IP address listed.
iOS
This short section will walk you through how to set up your OpenVPN Client in iOS. For this guide, we'll be installing the ovpn profile in OpenVPN Connect, which is available on all iOS devices.
Installing OpenVPN Connect
- Install the app from here: OpenVPN Connect
Syncing OVPN Files
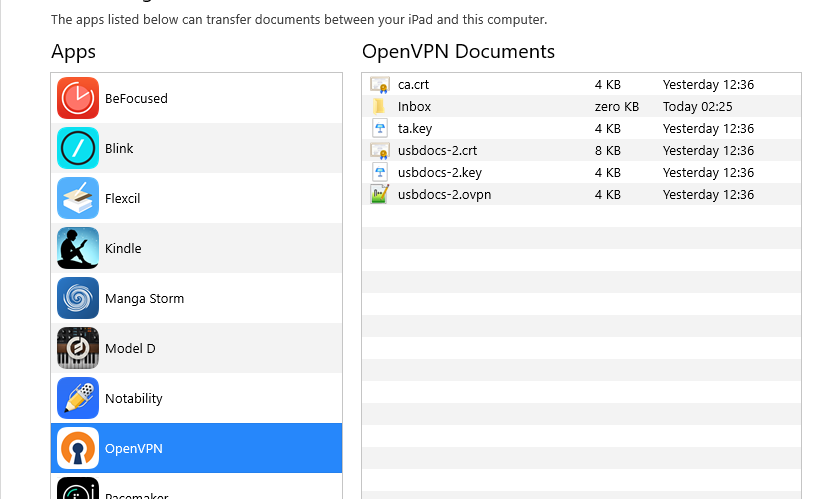
- Once installed, sync your ovpn files to your iOS device via iTunes' File Sharing Window
Running OpenVPN Connect
- Tap the OpenVPN Connect icon. The first time you launched it, allow it to send notifications and tap Agree to the Data Collection Policy.
- Your profile will be shown in the File Tab. Tap Add to the screens below.
- Then, Allow the app to add VPN configurations.
- Once done, Just tap the switch beside the profile you just added to connect to the slot VPN.
- You can also confirm that you've successfully connected by visiting What Is My Ip Address. You'll see the server's IP address listed.
Linux
This short section will walk you through how to set up your OpenVPN Client in Linux. This guide will be using OpenVPN on Debian but should be similar on distributions such as Ubuntu, Linux Mint, and elementary OS. It's best to refer to your distributions' manuals for specific instructions.
Installing OpenVPN Client
- Open up your terminal and run the following command
sudo apt install openvpn ca-certificates
cd ~/Downloads
sudo unzip {username}-x.zip -d /etc/openvpn/
- Then run OpenVPN using the following command
sudo openvpn {username}-x.ovpn
-
It'll show you the logs of the connection. Wait for a few minutes for it to connect successfully. You can also run the above command under
screenortmux -
To stop the connection, do CTRL + C to stop the OVPN client.
-
You can also confirm that you've successfully connected by visiting What Is My Ip Address. You'll see the server's IP address listed.
MacOS
This short section will walk you through how to set up your OpenVPN Client in macOS using Tunnelblick.
Installing Tunnelblick
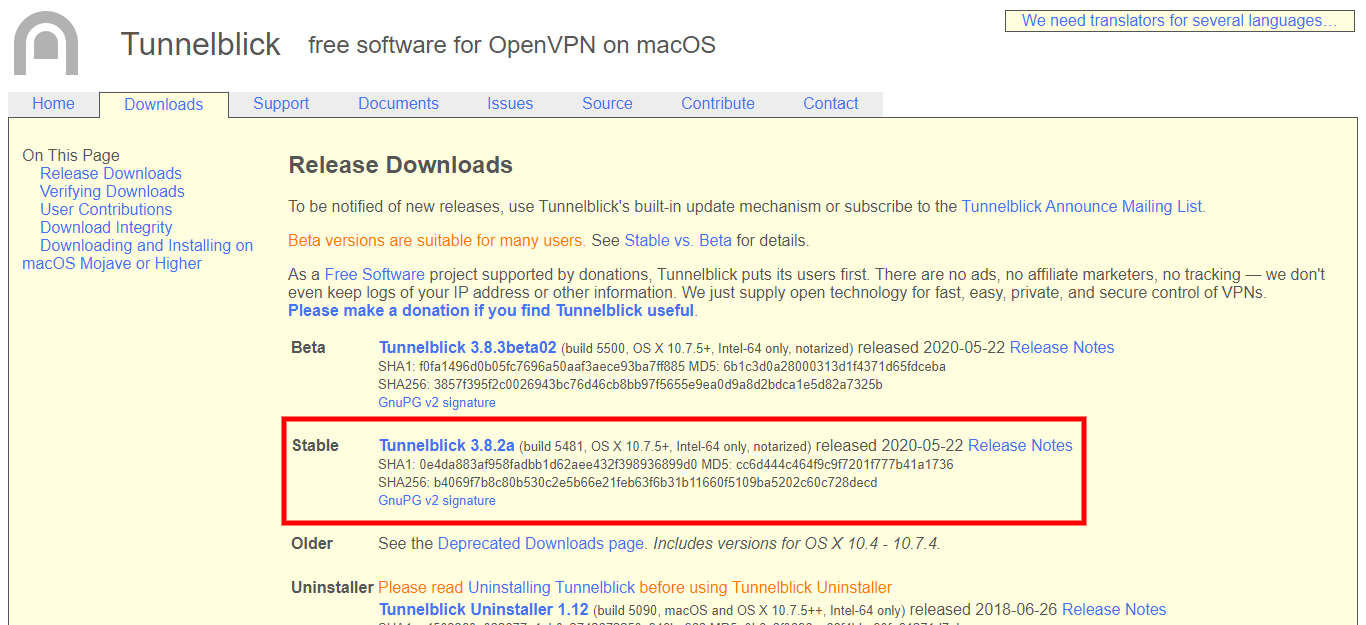
- Download and install the stable version of Tunnelblick here: Tunnelblick Downloads
Setting Up Tunnelblick
-
Once installed, you'll get a welcome screen that asks if you have configuration files or not. Click
I have configuration files. -
Extract your configuration files into a folder. We'll name the folder
ultra -
Add an extension of
.tblkat the end of the folder name, which in this case isultra.tblk. When you do this the icon for the folder will change to an icon for a Tunnelblick VPN Configuration. -
Drag and drop
ultra.tblkonto the Tunnelblick icon in the menu bar to install it.

- When asked to install configuration for all users, click
Only Me. After that, you'll get a notification that the config file has been installed.
Running Tunnelblick
- To connect, simply right-click the Tunnelblick icon and click
Connect ultra. You'll get confirmation that it's successfully connected. - You can also confirm that you've successfully connected by visiting What Is My Ip Address. You'll see the server's IP address listed.
Windows
This short section will walk you through how to set up your OpenVPN Client in Windows.
Installing OpenVPN GUI
- Download and install the appropriate version of OpenVPN GUI here: OpenVPN GUI Downloads
Setting Up OpenVPN GUI
- Copy the contents of the config to this folder
C:\Program Files\OpenVPN\config
Running OpenVPN GUI
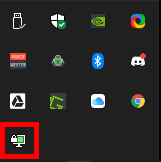
- Launch OpenVPN GUI. It'll launch an icon in your Taskbar.
- To connect to your VPN, just right-click the icon and select Connect. A window will show containing the logs of the VPN connection.
- You'll be successfully connected when the icon's screen changed to green.
- You can also confirm that you've successfully connected by visiting What Is My Ip Address. You'll see the server's IP address listed.
Troubleshooting OpenVPN GUI
- In case there are errors related to the Initialization Sequence. For example:
DHCP SERV =
DHCP LEASE OBTAINED = 2021-XX-YY 12:21:40
DHCP LEASE EXPIRES = 2021-YY-XX 12:21:40
DNS SERV =
Initialization Sequence Completed With Errors
- Then, this is an issue with the TCP/IP stack of your Windows installation. You can attempt to fix it with the steps illustrated HERE.