Recommended FTP Clients
Here are some FTP clients we recommend you use to manage your Ultra.cc service files.
FileZilla
Filezilla is a free FTP application that is available on most platforms. It supports Explicit FTPS and SFTP protocols in addition to the following features:
- Supports resume of files
- Parallel downloading of files (up to 10 simultaneous transfers)
- Tabbed User Interface
- Configurable Speed limits
Installation
Go here and download the latest version for your PC. Execute the downloaded file and follow the installation instructions.
Setting Up FileZilla
- When launching for the first time, you will be greeted by the main GUI of FileZilla.
- In the top menu bar, click the Site Manager
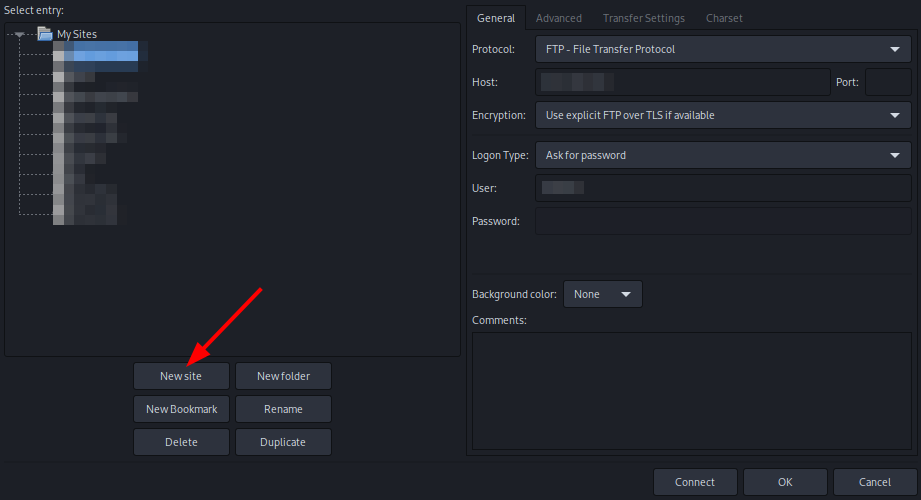
- A new window appears. Click the New Site button and name it.
- Then, you can input the following information from either of the following configurations:
FTPS
Protocol: FTP - File Transfer Protocol
Host: servername.usbx.me
Port: 21
Encryption: Require explicit FTP over TLS

Logon type: Normal
Username: <your-ultra-username>
Password: <your-ssh/ftp-password>
SFTP (Normal Logon)
Protocol: SFTP - SSH File Transfer Protocol
Host: servername.usbx.me
Port: 22

Logon type: Normal
Username: <your-ultra-username>
Password: <your-ssh/ftp-password>
SFTP (Keyfile Logon)
For more information on this, you can refer to this guide: Public Key Authentication
Protocol: SFTP - SSH File Transfer Protocol
Host: servername.usbx.me
Port: 22
Encryption: Require explicit FTP over TLS

Logon type: Key file
Username: <your-ultra-username>
Key file: <your-ultra-public-key>
- Once that's done, press OK.
- Another window appears, asking if you want to save your password. We recommend selecting "Save passwords protected by a master password". Add your master password and click OK.
- Make sure to choose a strong password, see this guide.
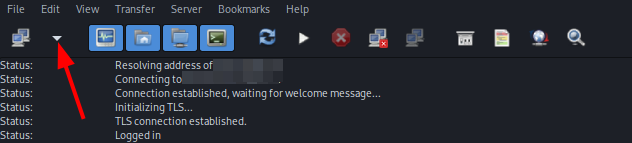
- Click the arrow icon to the right of the Site Manager icon, and select the site you previously created.
- When prompted, enter your master password.
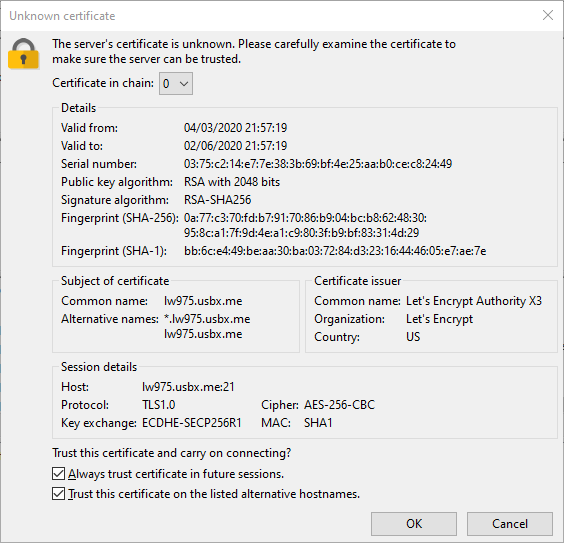
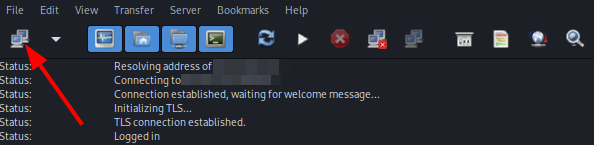
- If logging in the first time, you will see a message as shown in the above image. Click OK.
- Once logged in, you will see the files and folders of your Ultra.cc service on the right side of the GUI.
WinSCP
WinSCP (Windows Secure Copy) is a free and open-source SFTP, FTP, WebDAV, Amazon S3, and SCP client for Windows. It offers basic file manager and file synchronization functionality. For secure transfers, it uses Secure Shell (SSH) and supports the SCP protocol in addition to SFTP. In addition to this, WinSCP also offers the following features:
- Batch file scripting, command-line interface, and .NET wrapper
- Directory synchronization
- Integrated text editor
- Integration with PuTTY
Installation
To download and install WinSCP, go here and download the latest version.
Setting Up WinSCP
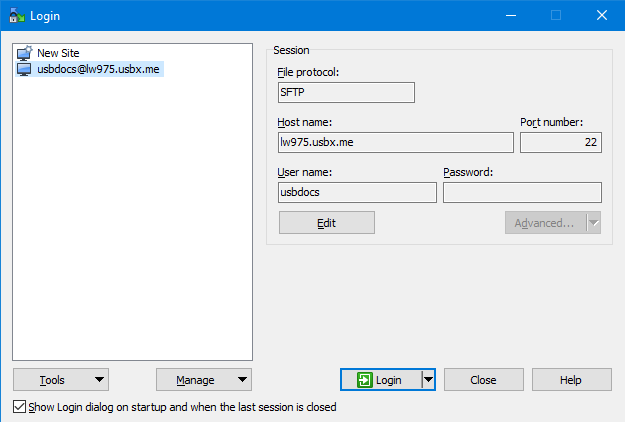
- When launching for the first time, the login dialog will show up first.
- Here, you can add the settings you wish
FTPS
Fle Protocol: FTP
Encryption: TLS/SSL Explicit Encryption
Host: servername.usbx.me
Port: 21

Username: <your-ultra-username>
Password: <your-ssh/ftp-password>
SFTP (Normal Logon)
Fle Protocol: SFTP
Host: servername.usbx.me
Port: 22

Username: <your-ultra-username>
Password: <your-ssh/ftp-password>
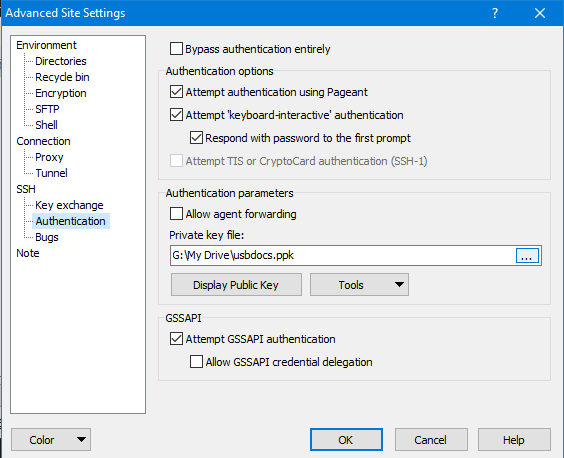
SFTP (Keyfile Logon)
For more information on this, you can refer to this guide: Public Key Authentication
Fle Protocol: SFTP
Host: servername.usbx.me
Port: 22

Username: <your-ultra-username>
Password: <blank>

To add keyfile, go to Advanced -> SSH -> Authentication -> Private key file
- Once it's added, click Save and add a name.
- You can check Save Password if you prefer. This is if you're using your own device.
- In this example, SFTP is used.
- After it has been added, double-click your newly created site to log in.
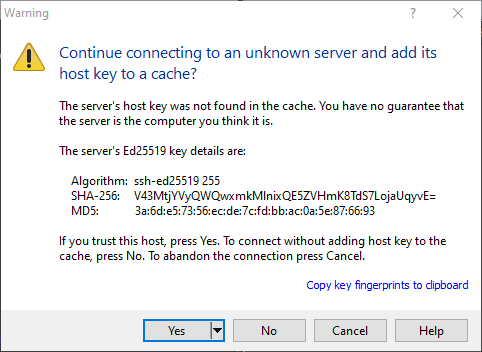
- If it is your first time logging in, a window as shown in the above image might appear. Just click Yes to continue.
- After a few moments, you will be logged in to your Ultra.cc service and can manage your files and folders.
Show Hidden Directories
- By default, files and folders that begin with a
.will be hidden. However, to allow these files and folders to be seen, you can pressCTRL+ALT+Hor by enabling Show hidden files in Preferences.
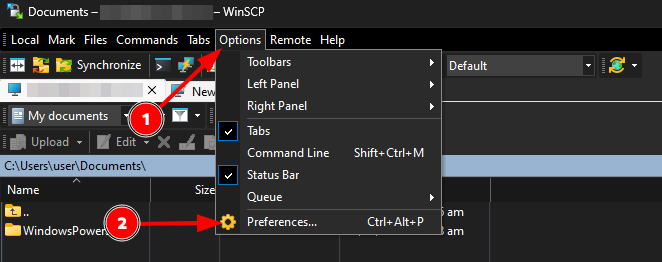
- To open Preferences, in the top menu bar, click on
 Options and then click
  Preferences, as shown in the above image.
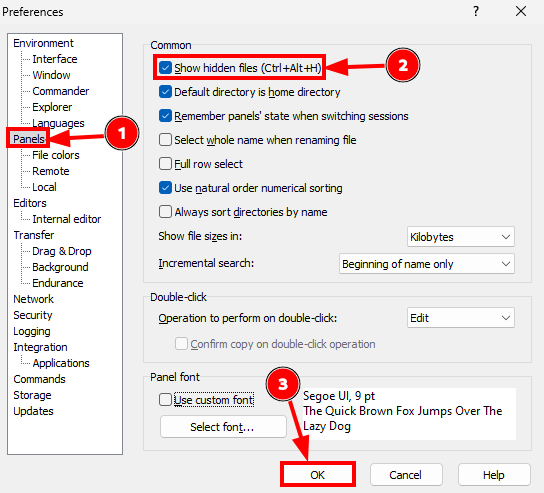
- Once the Preferences window appears, go to the Panels tab.
- Then, enable Show hidden files.
- Lastly, click the
 OK button.
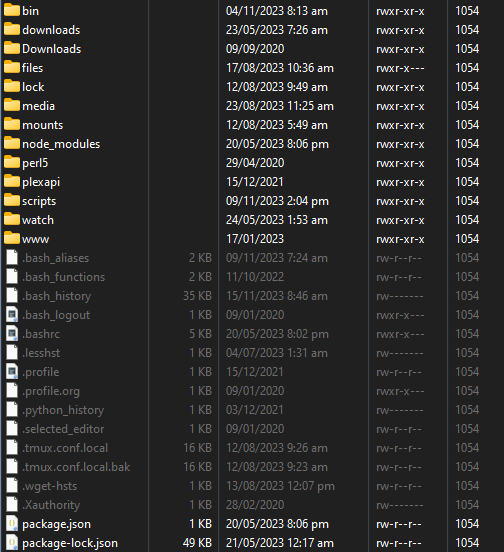
- If done successfully, you should now see hidden files in gray, as shown in the above image.